꽤 오랜 역사를 갖고 있지만,

최근 들어서 갑작스레 많은 관심을 받고 있는 Web-IDE & Cloud-IDE 이야기를 해보고자 한다.


학계(?), 업계(?)에서 명확히 구분해서 사용하고 있는 명칭은 아니지만

개인적으로 Web-IDE와 Cloud-IDE는 다음과 같이 구분을 하고 있다.


Web-IDE

- 웹 기반으로 소스코드 편집을 지원하는 IDE를 제공하는 서비스

- workspace(terminal) 환경을 제공하지 않는다.


Cloud-IDE

- Web-IDE 서비스 포함

- workspace(terminal) 환경도 포함


즉, `GitHub Codespaces` 서비스는 Cloud-IDE로 분류할 수 있다.

- https://github.com/features/codespaces

출처:  https://github.com/features/codespaces


아는 사람만 알고 있는 github.dev 서비스는 Web-IDE이다.

- https://www.whatwant.com/entry/githubdev (블로그 홍보^^)


최근에 preview로 공개한 github.dev의 사촌관계인 vscode.dev 서비스 역시 Web-IDE이다.

- https://vscode.dev/


많은 분들이 알고 있을 구름IDE는 Cloud-IDE 서비스이다.

- https://ide.goorm.io/


구름IDE는 아래 포스팅 내용 중에 소개한 적도 있다.

- https://www.whatwant.com/entry/한빛미디어-알쏭달쏭-C언어-180제


이번 포스트는 뭐 그냥 그렇다는 ...

그냥 기록용~


반응형

VSCode를 웹으로 접근해서 사용할 수 있도록 해주는 code-server를 소개한 적이 있다.

- Web based Visual Studio Code (Online VSCode)


공식적으로 제공해주는 docker image가 있긴 하지만,

이번에는 Kubernetes에 올려서 사용하기 위한 나만의 docker image를 만들어보려고 한다.


0. 작업 환경

  - 이하 과정을 진행한 환경은 다음과 같다.

    . OS: Ubuntu 18.04 Desktop

    . Docker: Docker version 20.10.7, build f0df350


  - Docker 설치는 다음 포스팅을 참고하기 바란다.

    . Docker Install (Ubuntu Server 20.04 - 64bit) - using Download

  - 지금 포스팅을 작성하는 시점에서의 최신 버전은 다음과 같다.

    . containerd.io_1.4.8-1_amd64.deb

    . docker-ce-cli_20.10.7~3-0~ubuntu-focal_amd64.deb

    . docker-ce_20.10.7~3-0~ubuntu-focal_amd64.deb


1. Dockerfile & Scripts

  - 아래 내용은 다음 링크를 참조했다.

    . https://git.nofla.me/k8s-projects/codekube

  - 위 내용 중 필요한 부분만 뽑아내고 재구성을 한 내용을 전체 공유하면 아래와 같다.


    . Dockerfile


FROM ubuntu:20.04

RUN apt-get update && apt-get upgrade -y
RUN DEBIAN_FRONTEND="noninteractive" apt-get install -y \
    wget \
    vim \
    curl \
    dumb-init \
    zsh \
    htop \
    locales \
    man \
    nano \
    git \
    procps \
    openssh-client \
    sudo \
    jq \
    openssl \
    bash-completion \
    dnsutils \
    lsb-release

RUN apt-get install -y python3 python3-pip python3-dev build-essential

RUN update-alternatives --install /usr/bin/python python /usr/bin/python3 1
RUN update-alternatives --install /usr/bin/pip pip /usr/bin/pip3 1

RUN apt-get install -y apt-utils locales
RUN locale-gen ko_KR.UTF-8
ENV LC_ALL ko_KR.UTF-8


RUN addgroup --gid 1000 code && \
    adduser --uid 1000 --ingroup code --home /home/code --shell /bin/bash --disabled-password --gecos "" code && \
    adduser code sudo
RUN chmod g+rw /home && \
    mkdir -p /home/code/workspace && \
    chown code:code /home/code/workspace -R


RUN echo '%sudo ALL=(ALL) NOPASSWD:ALL' >> /etc/sudoers;


RUN USER=code && \
    GROUP=code
RUN curl -SsL https://github.com/boxboat/fixuid/releases/download/v0.5/fixuid-0.5-linux-amd64.tar.gz | tar -C /usr/local/bin -xzf - && \
    chown root:root /usr/local/bin/fixuid && \
    chmod 4755 /usr/local/bin/fixuid && \
    mkdir -p /etc/fixuid && \
    printf "user: $USER\ngroup: $GROUP\n" > /etc/fixuid/config.yml


RUN CODE_SERVER_VERSION=3.11.0 && \
    curl -sSOL https://github.com/cdr/code-server/releases/download/v${CODE_SERVER_VERSION}/code-server_${CODE_SERVER_VERSION}_amd64.deb && \
    sudo dpkg -i code-server_${CODE_SERVER_VERSION}_amd64.deb


RUN cat /usr/lib/code-server/lib/vscode/product.json \
    | jq '.extensionAllowedProposedApi[.extensionAllowedProposedApi | length] |= . + "ms-vsliveshare.vsliveshare" \
        | .extensionAllowedProposedApi[.extensionAllowedProposedApi | length] |= . + "ms-vscode.node-debug" \
        | .extensionAllowedProposedApi[.extensionAllowedProposedApi | length] |= . + "ms-vscode.node-debug2"' \
    > /usr/lib/code-server/lib/vscode/product.json_ \
    && mv /usr/lib/code-server/lib/vscode/product.json_ /usr/lib/code-server/lib/vscode/product.json


RUN mkdir /opt/default_home
ADD warehouse/.bashrc /opt/default_home


ENV PASSWORD=${PASSWORD:-password}
EXPOSE 8080

ADD warehouse/restart-codekube.sh /usr/local/bin/restart-codekube
ADD warehouse/code.sh /usr/local/bin/code
ADD warehouse/startup.sh /startup.sh


RUN chmod a+x /usr/local/bin/*

ENTRYPOINT ["/bin/bash", "/startup.sh"]


  - 필요한 스크립트 파일은 다음과 같다.

    . .bashrc


# ~/.bashrc: executed by bash(1) for non-login shells.
# see /usr/share/doc/bash/examples/startup-files (in the package bash-doc)
# for examples

# If not running interactively, don't do anything
case $- in
    *i*) ;;
      *) return;;
esac

# don't put duplicate lines or lines starting with space in the history.
# See bash(1) for more options
HISTCONTROL=ignoreboth

# append to the history file, don't overwrite it
shopt -s histappend

# for setting history length see HISTSIZE and HISTFILESIZE in bash(1)
HISTSIZE=1000
HISTFILESIZE=2000

# check the window size after each command and, if necessary,
# update the values of LINES and COLUMNS.
shopt -s checkwinsize

# If set, the pattern "**" used in a pathname expansion context will
# match all files and zero or more directories and subdirectories.
#shopt -s globstar

# make less more friendly for non-text input files, see lesspipe(1)
[ -x /usr/bin/lesspipe ] && eval "$(SHELL=/bin/sh lesspipe)"

# set variable identifying the chroot you work in (used in the prompt below)
if [ -z "${debian_chroot:-}" ] && [ -r /etc/debian_chroot ]; then
    debian_chroot=$(cat /etc/debian_chroot)
fi

# set a fancy prompt (non-color, unless we know we "want" color)
case "$TERM" in
    xterm-color|*-256color) color_prompt=yes;;
esac

# uncomment for a colored prompt, if the terminal has the capability; turned
# off by default to not distract the user: the focus in a terminal window
# should be on the output of commands, not on the prompt
#force_color_prompt=yes

if [ -n "$force_color_prompt" ]; then
    if [ -x /usr/bin/tput ] && tput setaf 1 >&/dev/null; then
    # We have color support; assume it's compliant with Ecma-48
    # (ISO/IEC-6429). (Lack of such support is extremely rare, and such
    # a case would tend to support setf rather than setaf.)
    color_prompt=yes
    else
    color_prompt=
    fi
fi

if [ "$color_prompt" = yes ]; then
    PS1='${debian_chroot:+($debian_chroot)}\[\033[01;32m\]\u@\h\[\033[00m\]:\[\033[01;34m\]\w\[\033[00m\]\$ '
else
    PS1='${debian_chroot:+($debian_chroot)}\u@\h:\w\$ '
fi
unset color_prompt force_color_prompt

# If this is an xterm set the title to user@host:dir
case "$TERM" in
xterm*|rxvt*)
    PS1="\[\e]0;${debian_chroot:+($debian_chroot)}\u@\h: \w\a\]$PS1"
    ;;
*)
    ;;
esac

# enable color support of ls and also add handy aliases
if [ -x /usr/bin/dircolors ]; then
    test -r ~/.dircolors && eval "$(dircolors -b ~/.dircolors)" || eval "$(dircolors -b)"
    alias ls='ls --color=auto'
    #alias dir='dir --color=auto'
    #alias vdir='vdir --color=auto'

    alias grep='grep --color=auto'
    alias fgrep='fgrep --color=auto'
    alias egrep='egrep --color=auto'
fi

# colored GCC warnings and errors
#export GCC_COLORS='error=01;31:warning=01;35:note=01;36:caret=01;32:locus=01:quote=01'

# some more ls aliases
alias ll='ls -alF'
alias la='ls -A'
alias l='ls -CF'

# Add an "alert" alias for long running commands.  Use like so:
#   sleep 10; alert
alias alert='notify-send --urgency=low -i "$([ $? = 0 ] && echo terminal || echo error)" "$(history|tail -n1|sed -e '\''s/^\s*[0-9]\+\s*//;s/[;&|]\s*alert$//'\'')"'

# Alias definitions.
# You may want to put all your additions into a separate file like
# ~/.bash_aliases, instead of adding them here directly.
# See /usr/share/doc/bash-doc/examples in the bash-doc package.

if [ -f ~/.bash_aliases ]; then
    . ~/.bash_aliases
fi

# enable programmable completion features (you don't need to enable
# this, if it's already enabled in /etc/bash.bashrc and /etc/profile
# sources /etc/bash.bashrc).
if ! shopt -oq posix; then
  if [ -f /usr/share/bash-completion/bash_completion ]; then
    . /usr/share/bash-completion/bash_completion
  elif [ -f /etc/bash_completion ]; then
    . /etc/bash_completion
  fi
fi


    . restart-codekube.sh


#!/bin/bash
kubectl get pods "$HOSTNAME" || (
    echo "Use kubens to switch to the namespace of this instance and try again!"
    echo "(we can't do this for you since we don't know the namespace name)"
    exit 1
)
kubectl delete pod "$HOSTNAME"


    . code.sh


#!/bin/bash
# Script that mimics the open-from-stdin functionality of VSCode
if [ "$1" == "-" ]; then
    TEMP=$(mktemp /tmp/stdin_XXXXXX)
    cat > "$TEMP"
    exec code-server -r "$TEMP"
    exit 0
fi;

# Pass through everything else to `code-server`
# Shellcheck SC2068 = quoting variables to prevent globbing - we want that here.
# shellcheck disable=SC2068
exec code-server $@


    . startup.sh


#!/bin/bash
[[ -f /home/code/.homedir-initialized ]] || (
    echo "Remove this file to re-copy files from /etc/skel /opt/default_home at next container startup" > /home/code/.homedir-initialized
    # dotglob to catch files like `.bashrc`
    shopt -s dotglob
    cp -r /etc/skel/* /home/code
    cp -r /opt/default_home/* /home/code
    shopt -u dotglob
    # install kubernetes ext
    #su code --login -c "/usr/bin/code-server --install-extension ms-kubernetes-tools.vscode-kubernetes-tools"
)
# make workspace dir if it doesn't exist
[[ -d /home/code/workspace ]] || mkdir /home/code/workspace
# chown stuff to kube:kube
chown code:code /home/code -R
# generate env whitelist from su using.. a blacklist, pretty much.
env_whitelist=$(env | cut -d = -f 1 | grep -v -e HOSTNAME -e PWD -e HOME -e TERM -e SHLVL -e LC_ALL -e ^_$ | tr "\n" "," | head -c -1)
# configure kubectl so vscode's kubernetes extension works
# su code --login -w "$env_whitelist" -c "/usr/local/bin/generate-kubeconfig.sh"
# start code-server
# su code --login -w "$env_whitelist" -c "/usr/bin/code-server --bind-addr 0.0.0.0:8080 /home/code/workspace" # --enable-proposed-api [\"ms-vsliveshare.vsliveshare\",\"ms-vscode.node-debug\",\"ms-vscode.node-debug2\"]
runuser code --login -w "$env_whitelist" -c "/usr/bin/code-server --bind-addr 0.0.0.0:8080 /home/code/workspace" # --enable-proposed-api [\"ms-vsliveshare.vsliveshare\",\"ms-vscode.node-debug\",\"ms-vscode.node-debug2\"]


2. 설명

  ① Ubuntu 20.04를 기준으로 했다.

    . 18.04도 가능할 것으로 보이지만, `startup.sh` 내용 中 마지막 라인에 있는

    . `su` 또는 `runuser`의 `-w` 옵션이 18.04에서는 적용되지 않아서 지금은 20.04로 했다.

    → 18.04에서도 적용 가능하도록 연구해보겠다 (언제가 될지는...^^)


  ② 개발환경으로 사용되기에 기본적인 패키지들을 설치했다.

    . 추후 필요에 따라 추가하면 된다.

    . `DEBIAN_FRONTEND="noninteractive"` 부분이 없으면 설치 중간에 사용자 입력을 기다리기도 한다. (설치 오류)


  ③ Python3 설치 (pip 포함)

    . 일단 python3 개발환경으로 맞췄다.

    . 다른 언어 또는 라이브러리가 필요하다고 하면 자유롭게~


  ④ 한글 환경 설정 (locale)

    . 이 부분이 없으면 한글 처리에 문제가 발생한다.

    . 참고: 한글 지원되는 Ubuntu Docker Image 만들기

  ⑤ 사용자 계정 만들기 (code)

    . `code`라는 사용자 계정을 생성해서 이를 기준으로 맞추고자 했다.

    . 패스워드 없이 sudo 사용할수 있도록 했다.

    . `fixuid`를 이용해서 `code` 계정의 uid를 전체적으로 맞추도록 했다.


  ⑥ code-server 설치

    . 현재 시점의 최신 버전 `3.11.0`이 설치하도록 했다.


  ⑦ (예정) LiveShare 적용 준비

    . 지금은 아니지만, 나중에 LiveShare Extension 사용하도록 하기 위해 집어넣은 부분이다.

    . 아직은 분석이 필요한 단계


  ⑧ default home 준비

    . `code` 계정을 생성하면서 `/home/code` 디렉토리가 만들어졌는데,

    . 사용 중에 `/home/code` 디렉토리가 사라지면

    . 이를 다시 생성할 때 필요한 `.bashrc` 파일 같은 것을 넣어놓기 위한 과정이다.


  ⑨ 패스워드 및 포트 설정

    . `code-server` 접근할 때 필요로 하는 password를 지정하는 부분이다.

    . 외부에 노출되는 포트는 `8080`으로 했다.


  ⑩ 스크립트 복사

    . 필요에 따라 만들어진 스크립트들을 복사해 넣는 부분이다.


  ⑪ 실행

    . 실행 명령어 지정


3. build Image

  - 이미지 만들기는 다음과 같다.

    . 당연히 알겠지만, `-f Dockerfile` 부분은 생략 가능하다. (다른 파일명을 사용하는 경우에만 필요)


$ docker build -t code-server:v0.1 -f Dockerfile .


4. run Docker

  - Docker로 실행해 볼 수 있다


$ docker run -it -p 8080:8080 --name code -e PASSWORD="0000" code-server:v0.1


다행히 잘 동작한다.


반응형


앞에서 Visual Studio Code를 웹으로 사용하는 방법도 알아보았고,


Web based Visual Studio Code (Online VSCode)

https://www.whatwant.com/entry/Web-based-Visual-Studio-Code-Online-VSCode


Python 개발을 위한 환경도 꾸며보았다.


Visual Studio Code for Python (VSCode Python 개발환경 만들기)

https://www.whatwant.com/entry/Visual-Studio-Code-for-Python-VSCode-Python-개발환경-만들기


[ Powerline fonts in zsh ]


그런데, Terminal을 보면 뭔가 글자들이 깨진 것처럼 보인다.


필자의 경우 Ubuntu에 Shell 환경을

zsh로 꾸미면서 테마를 예쁘게 하다보니

일반적인 폰트를 사용하지 않기 때문이다.


일명 powerline 폰트 !!!


그냥 Terminal 화면에서는 아래와 같이 정상적으로 출력이 된다.


zsh 환경을 만들 때 아래와 같은 명령어를 통해 font를 설치했었다.


> sudo apt-get install fonts-powerline


※ Windows에서는 다음 링크에 있는 폰트를...

github.com/Falkor/dotfiles/tree/master/fonts


[ Visual Studio Code ... Conflict ]


하지만, VSCode 에서는 위의 폰트를 그대로 사용할 수 없단다,


VSCode는 "monospace fotns"만 지원한단다.


그래서 VSCode의 Terminal이 아래와 같이 깨진 폰트로 출력이 된다.


[ Setting Font ]


Settings의 Terminal 항목에서

"Integrated: Font Family"에 다음과 같이 셋팅하자.


'Ubuntu Mono', 'PowerlineSymbols'


※ Windows 에서는 다음과 같이 : 'SourceCodePro+Powerline+Awesome Regular'


Terminal 화면을 보면 알겠지만, 예쁘게 잘 나온다.


우와~ 깔끔하게 해결~!!!


반응형


앞에서 Visual Studio Code를 웹으로 사용하는 방법을 알아보았다.


Web based Visual Studio Code (Online VSCode)

https://www.whatwant.com/entry/Web-based-Visual-Studio-Code-Online-VSCode


그러면 이번에는 Python Code를 작성하기 위한 과정을 살펴보자.


아! 기본 운영체제는 Ubuntu 18.04 이다.


[ Python ]


Python을 설치하자.

2.x 와 3.x 모두 설치해버리자.


❯ sudo apt install python python-pip virtualenv

❯ sudo apt install python3 python3-pip python3-venv


[ Extension ]


VSCode를 실행하고...

왼쪽 제일 아래 아이콘을 클릭하면 VSCode의 Extension을 고를 수 있는 화면이 나온다.


검색어를 넣어서 검색을 해도 좋고,

보이는 것을 클릭해도 된다.


Python 관련 여러개의 Extension이 보이겠지만,

Microsoft에서 제공해주는 아이로 설치하자.


오른쪽에 나오는 화면의 "Install"을 클릭하면 된다.


설치가 되었지만, 바로 적용되는 것은 아니다.


"Reload Required"를 클릭해버리면 된다.


[ File ]


Python 파일을 만들기에 앞서서,

작업을 할 디렉토리가 먼저 준비되어야 한다.


미리 생성해놓을 수도 있고

VSCode에서 생성을 할 수도 있다.


원하는 디렉토리를 고르면 된다.


그리고, "New File"을 선택해서 파일 이름을 정해주면 된다.


[ Error ]


간단한 Python 파일을 만들고 실행을 해보기 전에,

어떤 버전의 Python을 사용할 것인지를 선택해보자.


왼쪽 아래에 나오는 "Python 3.6.9 64-bit" 부분을 클릭했더니...

에러가 발생했다.


"command 'python.setInterpreter' not found"


필요한걸 찾을 수가 없단다.


지금 code-server로 구동되고 있는 VSCode와 Extension의 궁합이 맞지 않아 발생하는 에러로 보인다.

(이걸 알아내기 위해 정말 오랫동안 삽질을... ㅠㅠ)


[ Extension Downgrade ]


왼쪽 아래 아이콘을 눌러서 Extension 메뉴로 간 뒤에

왼쪽 Installed 항목에 있는 Python에서

기어(Gear) 모양의 버튼을 누르고

"Install Another Version..." 메뉴를 선택하자.


주르륵 나오는 버전 중에서

"2020.5.86806"

버전을 고르자


"Reload Required"

눌러서 재시작~


못보던 아래와 같은 화면이 나오면 성공~!!!


[ Select Linter ]


Python Coding Style을 검사할 엔진(?)을 고르는 것이다.


위에 나오는 화면에서 "Select Linter"를 선택하거나


[Ctrl + Shift + P]를 눌러서 나오는 화면에서 "Linter" 타이핑해서

"Python: Select Linter"를 선택하자.


개인적으로는 "flake8"을 선호한다.


그러면 끝~!!


[ Run ]


이제, 다시 진행해보자.


왼쪽 아래에 나오는 "Python 3.6.9 64-bit" 부분을 클릭해보자.


Python 2.x를 사용할지

Python 3.x를 사용할지

고르면 된다.


소스 코드에서

마우스 오른쪽 버튼을 누르고

메뉴 중에서

"Run Python File in Terminal"

클릭~


아래와 같이 실행 결과가

Terminal 윈도우에 나온다.


끝~


반응형


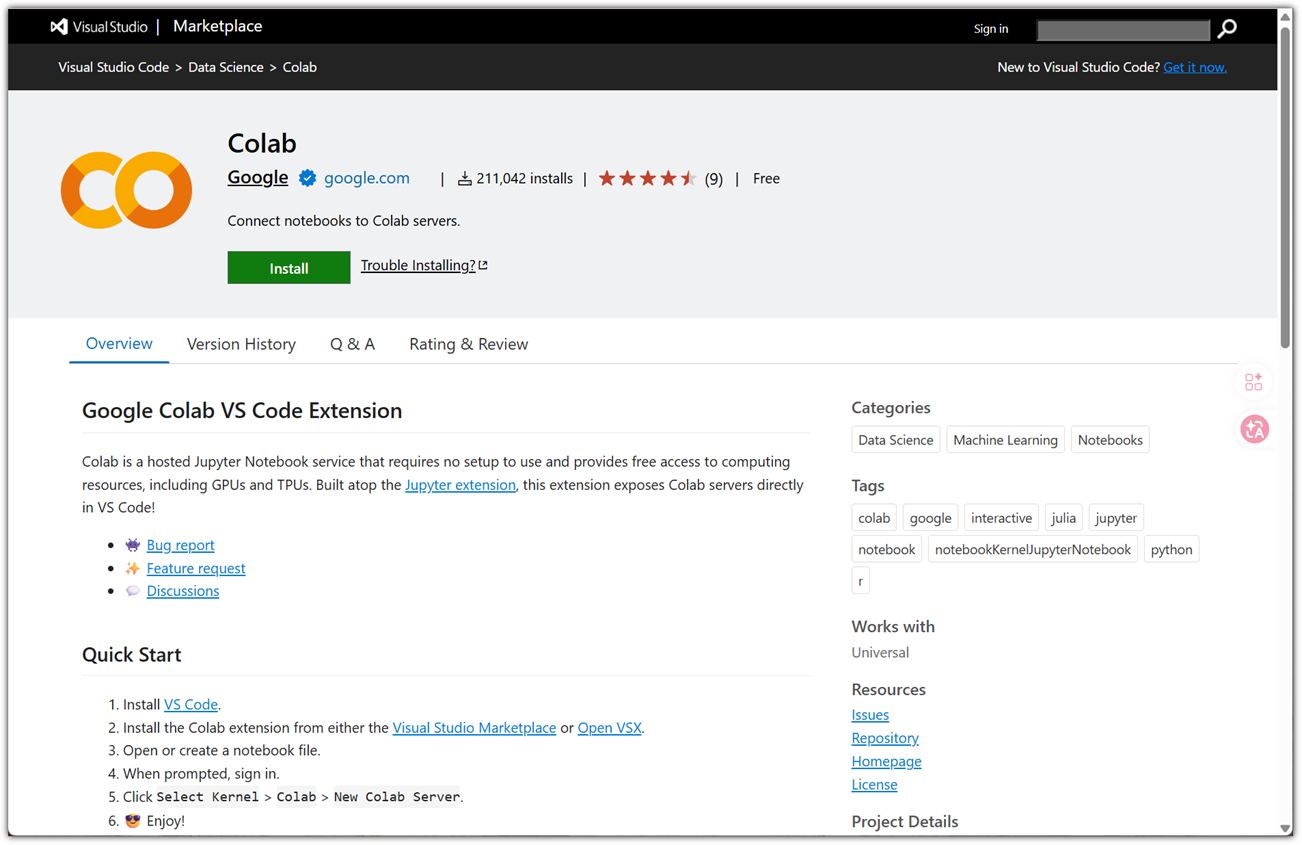
[ Visual Studio Code ]


최근 SW 개발用 에디터는 "Visual Studio Code"가 거의 시장을 평정한 것 같다.


이름이 저렇다고 해서

예전의 Visual Studio를 생각하면 안된다.


주위의 일부 고인물(^^)들이

VSCode가 Visual Studio의 최신판일줄 알고선

C나 C++ 개발이 아니라는 이유로

VSCode를 멀리하는데... ^^


VSCode는 그냥 똑똑한 에디터이다.

Extension(Plugin)이 엄청나게 많이 제공되는

Coding할 때 아주 많이 유용한...


음... 사실 에디터로 부르기 보다는

IDE (Integrated Development Environment)라고

부르는 것이 더 맞는 것 같다.


한국말로는 통합개발환경 ?!


[ Remote IDE / Cloud IDE ]


일반적으로 이러한 IDE는 Local PC에 설치를 하고

GitHub와 같은 형상관리 도구와 연계를 해서 소스코드를 내려받고

Local에 구축한 빌드환경에서 빌드를 해보는 것이

일반적인 개발 환경일 것이다.


그런데, 아래와 같은 상황에서는 환경 구축에 애로사항이 좀 있을 수 있다.


노트북이 없고 데스크탑밖에 없는데,

여기저기 이동(출장)을 다니며 코딩을 해야하는 경우


내가 지금 개발하고 있는 것을

다른 개발자와 같이 보면서 리뷰를 하고 싶은 경우


내 데스크탑은 Windows인데

빌드 환경으로 Linux 환경이 필요한 경우


전혀 다른 빌드 환경의 개발을

동시에 2개 이상을 해야하는 경우


빌드 환경 구축이 까다로운데

여러 명이 같이 개발을 하는 경우

심지어 초짜 개발자가 계속 투입되는 경우


이럴 때 사용할 수 있는 여러가지 방법 中

최근 내가 관심을 갖고 있는 것은 Remote IDE/Cloud IDE 이다.


빌드 환경을 포함한 VSCode를

웹 인터페이스로 제공을 해주는 것이다.
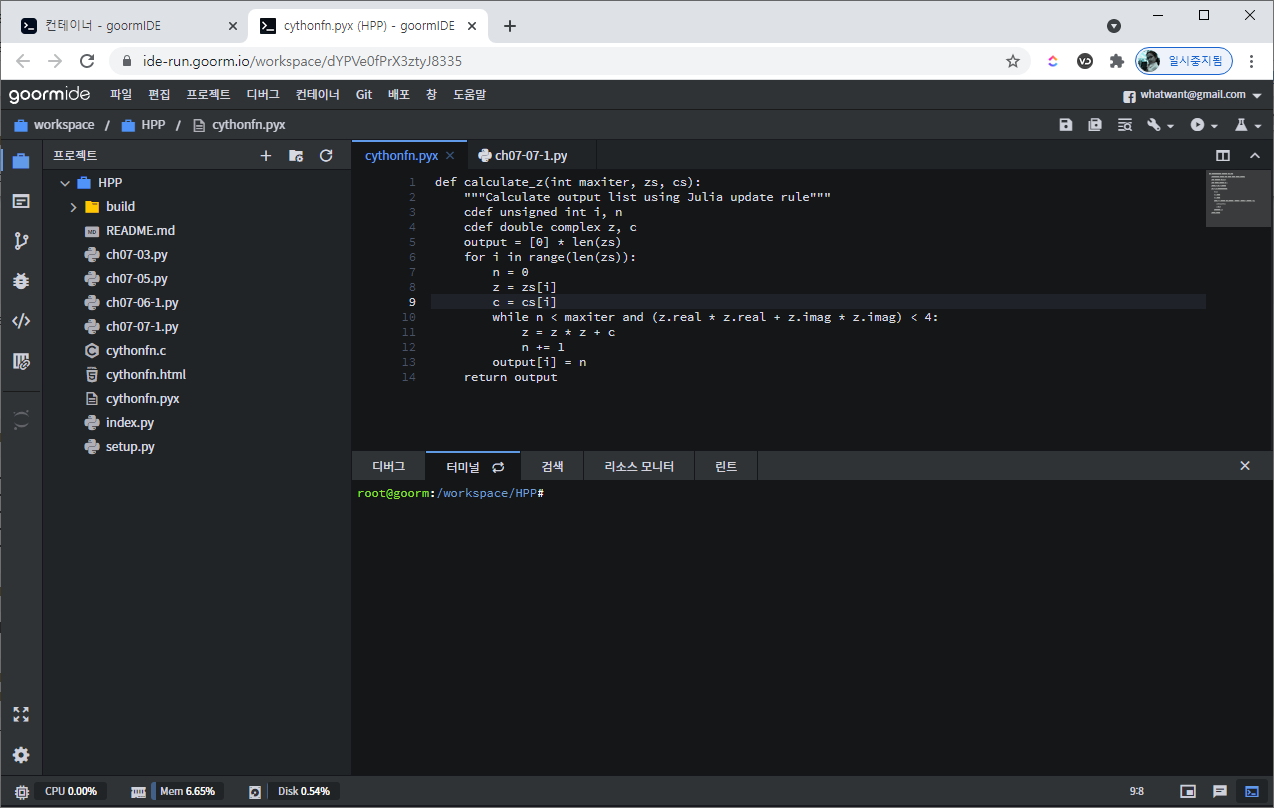


대표적으로는 얼마전에 살펴봤던

Goorm IDE

https://ide.goorm.io/


[ Visual Studio Codespaces ]


MS에서는 이러한 요구를 해결하기 위해서

"Visual Studio Online"

이라는 서비스를 제공했었고,


지금은

"Visual Studio Codespaces"
라는 이름으로 변경해서 서비스하고 있다.


방금 한 번 해봤는데... Azure DevOps랑 연계되어 있어서

그냥 편하게 막 쓰기엔 좀 귀찮았다.


하지만... 멋지다!


[ Own Remote IDE ]


뭐 지금까지 기본적인 배경 사항들에 대해서 알아봤다.


하지만, 지금 내가 하고 싶은 것은

내가 지금 사용하고 있는 Local 환경 (PC 또는 Server)에서

나만의 VSCode를 웹으로 띄우고 싶은 것이다.


나만 이런 생각을 하는 것이 아니기에...

훌륭한 분들이 먼저 그 길을 걸었다!!!


Coder라는 회사에서

https://coder.com/ )

관련 솔루션을 Opensource로 오픈했다.

https://github.com/cdr/code-server )


회사에서 오픈한 프로젝트라서 그런지

운영도 활발히 잘되고

문서화도 깔끔하다.


"code-server"를 이용하면

지금 내 데스크탑을 VSCode Server로 사용할 수가 있는 것이다.


[ code-server 설치하기 ]


쓸만한 성능을 보이기 위해서는


1 GB RAM

2 cores


정도의 스펙이 필요하다고 한다.

참고!!!


Local PC 또는 서버에 바로 설치할 수도 있고,

AWS 또는 GCP에 설치할 수도 있다고 한다.

참고!!!


설치하는 방법은 다양하게 제공된다.


1. curl 을 통해 install.sh를 실행하는 방법

2. 배포판에 따라 설치파일을 이용해 설치하는 방법

3. Docker를 이용하는 방법


[ 1. install.sh ]


"curl -fsSL https://code-server.dev/install.sh | sh -s -- --dry-run"


설치가 잘 될지 한 번 가볍게 테스트 해보고


❯ curl -fsSL https://code-server.dev/install.sh | sh -s -- --dry-run

Ubuntu 18.04.5 LTS

Installing v3.4.1 deb package from GitHub releases.


+ mkdir -p ~/.cache/code-server

+ curl -#fL -o ~/.cache/code-server/code-server_3.4.1_amd64.deb.incomplete -C - https://github.com/cdr/code-server/releases/download/v3.4.1/code-server_3.4.1_amd64.deb

+ mv ~/.cache/code-server/code-server_3.4.1_amd64.deb.incomplete ~/.cache/code-server/code-server_3.4.1_amd64.deb

+ sudo dpkg -i ~/.cache/code-server/code-server_3.4.1_amd64.deb


To have systemd start code-server now and restart on boot:

  systemctl --user enable --now code-server

Or, if you don't want/need a background service you can run:

  code-server


"curl -fsSL https://code-server.dev/install.sh | sh"


실제로 설치를 진행하자


❯ curl -fsSL https://code-server.dev/install.sh | sh

Ubuntu 18.04.5 LTS

Installing v3.4.1 deb package from GitHub releases.


+ mkdir -p ~/.cache/code-server

+ curl -#fL -o ~/.cache/code-server/code-server_3.4.1_amd64.deb.incomplete -C - https://github.com/cdr/code-server/releases/download/v3.4.1/code-server_3.4.1_amd64.deb

######################################################################## 100.0%##O=#  #                                                                      

+ mv ~/.cache/code-server/code-server_3.4.1_amd64.deb.incomplete ~/.cache/code-server/code-server_3.4.1_amd64.deb

+ sudo dpkg -i ~/.cache/code-server/code-server_3.4.1_amd64.deb

[sudo] xxx의 암호: 

Selecting previously unselected package code-server.

(데이터베이스 읽는중 ...현재 175469개의 파일과 디렉터리가 설치되어 있습니다.)

Preparing to unpack .../code-server_3.4.1_amd64.deb ...

Unpacking code-server (3.4.1) ...

code-server (3.4.1) 설정하는 중입니다 ...


To have systemd start code-server now and restart on boot:

  systemctl --user enable --now code-server

Or, if you don't want/need a background service you can run:

  code-server


부팅할 때 자동으로 실행되도록하기 위해서는 다음의 명령어를 실행하면 된다.


"systemctl --user enable --now code-server"


❯ systemctl --user enable --now code-server

Created symlink /home/xxx/.config/systemd/user/default.target.wants/code-server.service → /usr/lib/systemd/user/code-server.service.


이제 웹브라우저로 확인해보자.


"http://127.0.0.1:8080"


패스워드는 위 화면에서 알려주는 것 처럼

아래 경로에 가면 알 수 있다.


"~/.config/code-server/config.yaml"


❯ cat  ~/.config/code-server/config.yaml

bind-addr: 127.0.0.1:8080

auth: password

password: 0f8015b4dbd5db86079f739a

cert: false


저기있는 패스워드를 입력하면 된다.


나온다 !!!


우와~~~~~ ^^


[ 2. 배포판에 따른 설치 ]


install.sh 파일 내용을 보면

다른 배포판에 대해서도 알아볼 수 있을 것이다.


여기에선 Ubuntu에서의 내용만~^^


일단 파일을 내려 받자


> wget https://github.com/cdr/code-server/releases/download/v3.4.1/code-server_3.4.1_amd64.deb


이제는 설치를 하면 된다.


> sudo dpkg -i code-server_3.4.1_amd64.deb

[sudo] chani의 암호: 

Selecting previously unselected package code-server.

(데이터베이스 읽는중 ...현재 175469개의 파일과 디렉터리가 설치되어 있습니다.)

Preparing to unpack code-server_3.4.1_amd64.deb ...

Unpacking code-server (3.4.1) ...

code-server (3.4.1) 설정하는 중입니다 ...


부팅할 때 자동 실행을 위해서...


❯ systemctl --user enable --now code-server

Created symlink /home/xxx/.config/systemd/user/default.target.wants/code-server.service → /usr/lib/systemd/user/code-server.service.


나머지는 위의 내용과 같다.


[ 3. Docker ]


docker가 먼저 설치되어 있어야 한다.


> sudo apt -y install docker.io


사용자 계정 권한으로 docker를 실행할 수 있도록 하자.


> sudo usermod -aG docker $USER


권한이 적용될 수 있도록

로그아웃/로그인 또는 재부팅을 하도록 하자.


그리고... 이제 docker를 실행하자 !!!


> docker run -it -p 127.0.0.1:8080:8080 \

  -v "$PWD:/home/coder/project" \

  -u "$(id -u):$(id -g)" \

  codercom/code-server:latest

info  Wrote default config file to ~/.config/code-server/config.yaml

info  Using config file ~/.config/code-server/config.yaml

info  Using user-data-dir ~/.local/share/code-server

info  code-server 3.4.1 48f7c2724827e526eeaa6c2c151c520f48a61259

info  HTTP server listening on http://0.0.0.0:8080

info      - Using password from ~/.config/code-server/config.yaml

info      - To disable use `--auth none`

info    - Not serving HTTPS


웹으로 접속하면 된다.


"http://127.0.0.1:8080"


어?! 그런데, 패스워드는 어떻게 확인하지 ?!


docker container 안으로 들어가서 확인해보자.


docker 실행을 하고 있는 터미널 말고

터미널 하나 더 띄워서 실행하면 된다.


❯ docker ps -a

CONTAINER ID        IMAGE                         COMMAND                  CREATED             STATUS              PORTS                      NAMES

235751eb3ebb        codercom/code-server:latest   "dumb-init fixuid -q…"   4 minutes ago       Up 4 minutes        127.0.0.1:8080->8080/tcp   dreamy_haibt


❯ docker exec -it 23575 /bin/bash


coder@235751eb3ebb:~$ ls -al

total 32

drwxr-xr-x 1 coder coder 4096 Aug 12 14:55 .

drwxr-xr-x 1 root  root  4096 Jun  4 10:59 ..

-rw-r--r-- 1 coder coder  220 Jun  4 10:59 .bash_logout

-rw-r--r-- 1 coder coder 3526 Jun  4 10:59 .bashrc

drwxr-xr-x 3 coder coder 4096 Aug 12 14:55 .config

-rw-r--r-- 1 coder coder  807 Jun  4 10:59 .profile

drwxr-xr-x 2 coder coder 4096 Aug 12 14:55 project


coder@235751eb3ebb:~$ cat ./.config/code-server/config.yaml 

bind-addr: 127.0.0.1:8080

auth: password

password: 665b7519d76a99e5bbcccac2

cert: false


우앙~ 힘들다!


일단 여기서 끊고 가겠다.


여력이 되면 추가로 꾸미는 것들 계속 해보겠다.


반응형


우선 한 가지 전제를 하고 포스팅을 하겠다.

필자는 LDAP에 대한 기본 지식이 없다. 그냥 막 쓰고 싶은 마음만 갖고 있을 뿐이다.


1. phpLDAPadmin 화면


   - 설치 후 처음으로 보인 화면이다.


2. dc ? cn ?


   - 무언가 약자가 많이 등장한다. 무슨 의미일까?

   - 우선 아래에 나열한 정도로 만족하자.


entry 

  attribute

dc

Domain Component

  도메인에 대한 요소

cn

Common Name

  이름

sn

Sir Name

  성 (Family Name)

ou

Organization Unit

  그룹 (조직)

dn

Distinguished Name

  특정한 사용자를 구분할 수 있는 고유의 이름


3. "Create new entry here" and warning !


   - 새로운 무언가를 생성해보기 위해서 "Create new entry here"를 선택하니 경고 화면이 나왔다.


   - "template"과 관련된 무언가가 잘 맞지 않는 것으로 보인다. 정리해보자.


$ sudo su

$ cd /etc/phpldapadmin/templates/creation

$ mkdir bak
$ mv ./sambaSamAccount.xml ./bak/
$ mv ./courierMailAlias.xml ./bak/

$ mv ./mozillaOrgPerson.xml ./bak/

$ service slapd restart


   - 문제가 되는 것들을 전부 치워놓고 서비스 재시작 한 후 다시 접근하면...


   - 이제서야 뭔가 제대로 된 것처럼 보인다.

   - (x) 표시가 된 것을을 보면... 방금 한 행위들이 어떤 의미인지 살짝 엿보인다.


하나씩 알아나가 보자.


반응형

'Development Tools > OpenLDAP' 카테고리의 다른 글

phpLDAPadmin - Group 만들기  (0) 2014.12.30
OpenLDAP (Ubuntu 14.04, Package)  (0) 2014.12.08


Docker라는 놈도 Ubuntu 환경에서 그다지 유연하고 편하게 사용할 수 있는 것은 아닌 것 같다.


일단, 32bit 환경은 지원하지 않는다. 64bit 환경에서만 Docker를 사용할 수 있다.

또 하나는 12.04 에서는 Docker를 패키지로 바로 제공해주지 않는다.


Docker에서는 나름 편하게 설치할 수 있도록 도움은 주고 있지만, 솔직히 좀 귀찮다.


1. Docker 설치


$ sudo apt-get install curl


$ curl -sSL https://get.docker.com/ | sh


$ docker --version
Docker version 1.8.2, build 0a8c2e3


2. Docker Group 설정


사용자 계정으로 docker를 실행할 수 있는지 다음과 같이 확인해보자.


$ docker run hello-world
Post http:///var/run/docker.sock/v1.20/containers/create: dial unix /var/run/docker.sock: permission denied.
* Are you trying to connect to a TLS-enabled daemon without TLS?
* Is your docker daemon up and running?


위와 같이 나온다면 권한이 없는 것이다. 다음과 같이 그룹 설정을 하자.


$ sudo usermod -aG docker <사용자 계정>


위와 같이 한 뒤에 다시 재로그인을 해야 한다. (심지어 재부팅이 필요할수도)


$ docker run hello-world
Unable to find image 'hello-world:latest' locally
latest: Pulling from library/hello-world


535020c3e8ad: Pull complete
af340544ed62: Pull complete
Digest: sha256:a68868bfe696c00866942e8f5ca39e3e31b79c1e50feaee4ce5e28df2f051d5c
Status: Downloaded newer image for hello-world:latest


Hello from Docker.
This message shows that your installation appears to be working correctly.


To generate this message, Docker took the following steps:
 1. The Docker client contacted the Docker daemon.
 2. The Docker daemon pulled the "hello-world" image from the Docker Hub.
 3. The Docker daemon created a new container from that image which runs the
    executable that produces the output you are currently reading.
 4. The Docker daemon streamed that output to the Docker client, which sent it
    to your terminal.


To try something more ambitious, you can run an Ubuntu container with:
 $ docker run -it ubuntu bash


Share images, automate workflows, and more with a free Docker Hub account:
 https://hub.docker.com


For more examples and ideas, visit:
 https://docs.docker.com/userguide/


3. Redmine pull


$ docker pull sameersbn/postgresql:9.4-4


$ docker pull sameersbn/redmine:3.1.1


4. Redmine Run


$ docker run --name=postgresql-redmine -d --env='DB_NAME=redmine_production' --env='DB_USER=redmine' --env='DB_PASS=password' --volume=/srv/workspace/redmine/postgresql:/var/lib/postgresql sameersbn/postgresql:9.4-4


$ docker run --name=redmine -d --link=postgresql-redmine:postgresql --publish=10083:80 --env='REDMINE_PORT=10083' --volume=/srv/workspace/redmine/redmine:/home/redmine/data sameersbn/redmine:3.1.1


아직은 많은 이해와 활용력이 부족하여 이번 포스팅에서 설명을 달지는 않겠다.

일단 위와 같이 진행을 하면 http://localhost:10083 으로 접속을 하면 Redmine을 만날 수 있다!


참고 : https://github.com/sameersbn/docker-redmine#installation


반응형


기존에 redmine을 설치할 때에는 Ruby의 난관에 부딪히다보니 root 계정을 통해 설치 진행을 했다.

당연히 권한 관리에 문제의 여지가 있지만... Ruby의 난관이 높다보니...

그래서 이번에는 사용자계정을 이용해서 설치하는 것을 해보고자 한다!


한동안 Redmine을 버려두고 있다보니... 오랜만에 살펴보니...

어느덧 3.1.1 버전까지 나온 Redmine !


00. 버전 호환성 확인하기

   - Redmine이 지원하는 Ruby 버전은 아래와 같다.

 Redmine  Supported Ruby  Required Rails

 current trunk
 3.0

 ruby 1.9.3, 2.0.0, 2.1, 2.2  Rails 4.2


01. 기본 패키지 설치


$ sudo apt-get install apache2 curl bison libbison-dev zlib1g-dev libssl-dev sqlite3 libsqlite3-dev autoconf automake build-essential libtool libreadline6-dev libyaml-dev libxml2-dev libcurl4-openssl-dev libssl-dev libgpg-error-dev autotools-dev imagemagick libmagickcore-dev libmagickwand-dev


02. Ruby 설치
 

$ sudo add-apt-repository ppa:brightbox/ruby-ng

$ sudo apt-get update

$ sudo apt-get install ruby2.1 ruby-switch ruby2.1-dev libruby2.1

$ sudo ruby-switch --set ruby2.1


03. Redmine 계정/그룹 생성
 

$ sudo adduser --system --shell /bin/bash --gecos 'Redmine Administrator' --group --disabled-password --home /srv/redmine redmine


$ sudo visudo


# temp - *REMOVE* after installation
redmine    ALL=(ALL)      NOPASSWD:ALL


04. rvm 설치


- 여기에서 주의할 점은 redmine 계정으로 설치를 진행한다는 점이다. 이 부분을 주의해서...


$ sudo su - redmine
$ gpg --keyserver hkp://keys.gnupg.net --recv-keys 409B6B1796C275462A1703113804BB82D39DC0E3
$ curl -sSL https://get.rvm.io | bash -s stable
$ exit


$ sudo su - redmine
$ rvm install 2.1.4
$ exit 


05. Redmine 다운로드


$ sudo su - redmine 

$ wget http://www.redmine.org/releases/redmine-3.1.1.tar.gz
$ tar zxvf  redmine-3.1.1.tar.gz

$ ln -s /srv/redmine/redmine-3.1.1 redmine

$ exit


06. PostgreSQL 설치 및 설정


$ sudo apt-get install postgresql libpq-dev

$ sudo su - postgres
$ psql


# CREATE ROLE redmine LOGIN ENCRYPTED PASSWORD 'my_password' NOINHERIT VALID UNTIL 'infinity';
# CREATE DATABASE redmine WITH ENCODING='UTF8' OWNER=redmine;
# \q


$ exit


$ sudo su - redmine 

$ cp redmine/config/database.yml.example redmine/config/database.yml

$ nano redmine/config/database.yml


production:
        adapter: postgresql
        database: redmine
        host: localhost
        username: redmine
        password: "redmine"
        encoding: utf8
        schema_search_path: public


     - 주의 사항으로는 위의 파일 내용을 입력할 때에 Tab 말고 White-Space로 입력해야 한다.

$ exit


07. bundler & install

$ sudo su - redmine

$ cd ./redmine
$ gem install bundler
$ bundle install --without development test mysql sqlite

$ rake generate_secret_token
$ RAILS_ENV=production rake db:migrate
$ RAILS_ENV=production rake redmine:load_default_data

→ ko (enter)
$ exit


08. Redmine 계정 정리


$ sudo visudo


- 아래 부분 제거


# temp - *REMOVE* after installation
redmine    ALL=(ALL)      NOPASSWD:ALL


09. Passenger 설치


$ sudo apt-key adv --keyserver keyserver.ubuntu.com --recv-keys 561F9B9CAC40B2F7

$ sudo apt-get update 

$ sudo apt-get install apt-transport-https ca-certificates

$ sudo nano /etc/apt/sources.list.d/passenger.list


12.04

deb https://oss-binaries.phusionpassenger.com/apt/passenger precise main


14.04

deb https://oss-binaries.phusionpassenger.com/apt/passenger trusty main


$ sudo chown root:root /etc/apt/sources.list.d/passenger.list
$ sudo chmod +r /etc/apt/sources.list.d/passenger.list


$ sudo apt-get update
$ sudo apt-get install libapache2-mod-passenger


$ sudo nano /etc/apache2/mods-available/passenger.conf


...

PassengerUserSwitching on
PassengerUser redmine
PassengerGroup redmine

...


10. Apache 설정


12.04

$ sudo nano /etc/apache2/sites-available/default


14.04

$ sudo nano /etc/apache2/sites-available/000-default.conf


...

<Directory /var/www/html/redmine>
    RailsBaseURI /redmine
    PassengerResolveSymlinksInDocumentRoot on
</Directory>

...


$ sudo a2enmod passenger
$ sudo ln -s /srv/redmine/redmine/public /var/www/html/redmine
$ sudo service apache2 restart


- 아래와 같이 에러메시지가 보이면... 다음 링크를 참고!!

: http://www.whatwant.com/440


$ sudo service apache2 restart
 * Restarting web server apache2                                                                             AH00558: apache2: Could not reliably determine the server's fully qualified domain name, using 127.0.1.1. Set the 'ServerName' directive globally to suppress this message


여기까지 진행하고 웹브라우저로 localhost/redmine에 접속을 하면 Redmine을 볼 수 있다.

초기 관리자는 admin/admin 이다.

 
반응형

+ Recent posts