
MinIO는
Amazon S3 서비스를 On-Premise 환경에서 사용할 수 있도록 해주는
최근 많은 인기를 얻고 있는 유명한 Object Storage 프로젝트이다.
MinIO | High Performance, Kubernetes Native Object Storage
MinIO's High Performance Object Storage is Open Source, Amazon S3 compatible, Kubernetes Native and is designed for cloud native workloads like AI.
min.io
AI 개발환경을 On-Premise에서 구축할 때
사진, 동영상 같은 데이터 또는 컨테이너 이미지와 같은 비정형 데이터를 저장하기 위한 서비스 中
설치도 간편하고 Amazon S3와 호환이 되다보니 MinIO가 아주 유명세를 떨쳤다.
그래서, 신규 시스템을 구축할 때 스토리지 용도로 MinIO를 선택했는데...
막상 해보니... 쉬운 아이가 아닌 것 같다는....
지금부터 설명할 과정은 다음과 같은 환경에서 진행하였다.
- VirtualBox Guest 3개 구성
. Guest OS : Ubuntu 20.04 Server - 64bit
. Guest HW : CPU 2 core, MEM 4 GB
- Kubernetes : 1 master, 2 worker node 구성
. 설치 도구 : Kubespray
. K8s version : 1.20.6
MinIO 설치는 Kubernetes 환경에서 Standalone 방식으로 진행해보고자 한다.
참고했던 컨텐츠는 아래와 같다.
https://github.com/kubernetes/examples/tree/master/staging/storage/minio
kubernetes/examples
Kubernetes application example tutorials. Contribute to kubernetes/examples development by creating an account on GitHub.
github.com
1. StorageClass
- 특정 노드의 local storage를 실제 저장공간으로 사용하기 위한 내용으로 작성했다.
- dynamic provisioning을 위해 volumeBindingMode를 'WaitForFirstComsumer'로 잡았다.
[ minio-standalone-storageclass.yaml ]

apiVersion: storage.k8s.io/v1
kind: StorageClass
metadata:
  name: local-storage

provisioner: kubernetes.io/no-provisioner

volumeBindingMode: WaitForFirstConsumer
2. PersistentVolume
- worker node 中 하나인, 'worker2'의 특정 디렉토리를 실제 저장 공간으로 정했다.
[ minio-standalone-pv.yaml ]

apiVersion: v1
kind: PersistentVolume
metadata:
  name: local-pv

spec:
  capacity:
    storage: 1Gi

  accessModes:
  - ReadWriteOnce

  persistentVolumeReclaimPolicy: Retain

  storageClassName: local-storage

  local:
    path: /data/volumes/pv1

  nodeAffinity:
    required:
      nodeSelectorTerms:
      - matchExpressions:
        - key: kubernetes.io/hostname
          operator: In
          values:
          - worker2
3. PersistentVolumeClaim
- 앞에서 선언한 StorageClass, PersistentVolume과 매핑되는 PVC를 작성했다.
[ minio-standalone-pvc.yaml ]

apiVersion: v1
kind: PersistentVolumeClaim
metadata:
  name: minio-pv-claim
  labels:
    app: minio-storage-claim

spec:
  accessModes:
    - ReadWriteOnce

  storageClassName: local-storage

  resources:
    requests:
      storage: 1Gi
4. Deployment
- MinIO 서비스를 위한 Deployment이며, 당연히 앞에서 선언한 PVC를 사용했다.
[ minio-standalone-deployment.yaml ]

apiVersion: apps/v1
kind: Deployment
metadata:
  name: minio-deployment

spec:
  selector:
    matchLabels:
      app: minio

  strategy:
    type: Recreate

  template:
    metadata:
      labels:
        app: minio

    spec:
      volumes:
      - name: storage
        persistentVolumeClaim:
          claimName: minio-pv-claim

      containers:
      - name: minio
        image: minio/minio:latest
        args:
        - server
        - /storage
        env:
        - name: MINIO_ACCESS_KEY
          value: "minio"
        - name: MINIO_SECRET_KEY
          value: "minio123"
        ports:
        - containerPort: 9000
          hostPort: 9000
        volumeMounts:
        - name: storage
          mountPath: "/storage"
5. Service
- MinIO 서비스를 외부로 노출하기 위한 Service를 선언해보았다.
[ minio-standalone-service.yaml ]

apiVersion: v1
kind: Service
metadata:
  name: minio-service

spec:
  type: NodePort

  ports:
    - port: 9000
      targetPort: 9000
      nodePort: 30333

  selector:
    app: minio
[ 결과 ]
여기까지
차례대로 create 하면 MinIO 서비스 웹을 볼 수 있다.

Access Key / Secret Key 값은 Deployment YAML을 보면 확인할 수 있다.
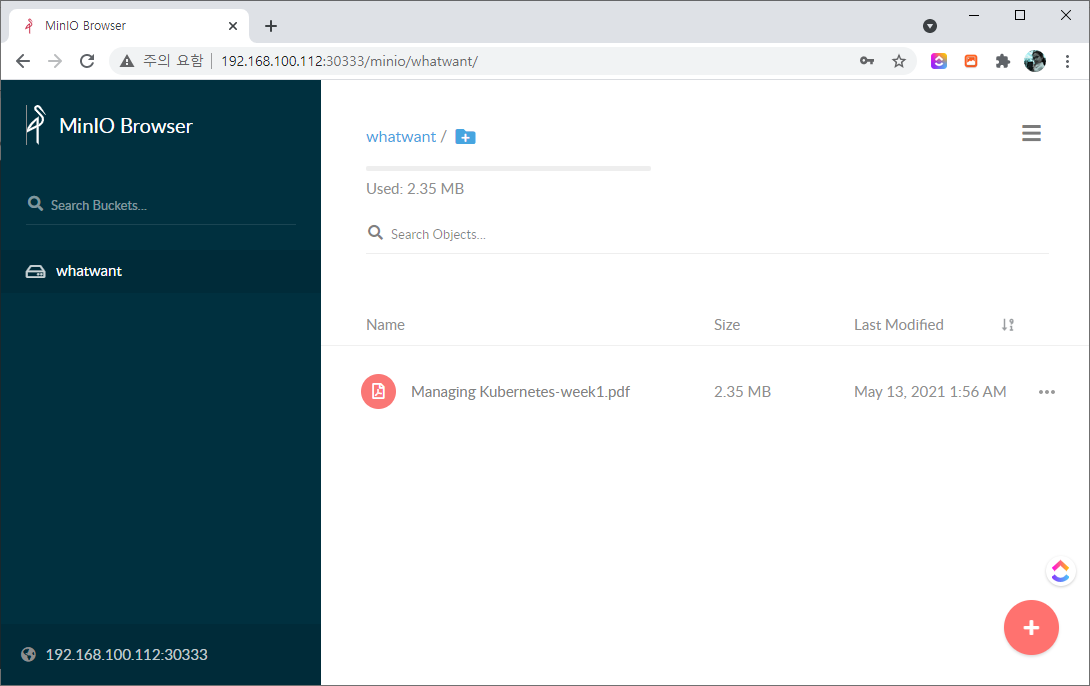
오른쪽 하단에 있는 "+" 버튼을 통해 bucket도 생성할 수 있고, 파일도 업로드 할 수 있다.
물론 다운로드도 가능한 Storage 웹서비스를 확인할 수 있다.
'Dev Tools > Kubernetes' 카테고리의 다른 글
| Install `NGINX Ingress Controller` in Kubernetes (4) | 2021.09.18 |
|---|---|
| Kubernetes 환경 구축 (Vagrant + VirtualBox + Kubespray) (0) | 2021.07.27 |
| Kubespray 이용하여 Kubernetes 설치하기 (5) | 2021.05.04 |
| Kubernetes Install (Ubuntu 20.04) (0) | 2020.12.28 |
| Minikube install (in Ubuntu 18.04 in VirtualBox) (0) | 2020.08.22 |