주석만 작성해도, function 이름만 적어줘도 AI가 코드를 대신 작성해준다고 하는 Copilot !!!


광고/홍보를 그렇게 해놓고는...

한정된 사람들만 사용할 수 있게 해주는 불친절한 GitHub !! 아니 MS !!!


뭐 어떻게 어떻게 사용해볼 수 있기 기회를 얻어서

다음과 같이 사용해보았다.


Already enabled


내 본캐 계정에서는 아직도 대기중인데...


Extension


GitHub 웹사이트에서 바로 사용하는 것은 말이 안되기에 어떤 방식으로 제공해주나 했는데...

Visual Studio Code Extension 형태로 제공해준다 !!!

Extension 설치 !!!


VSCode Extension


21만명이 사용하고 있나보다.

별점이 4개 밖에 안되네!? ㅋㅋㅋ


Sign in to GitHub


당연하게도 GitHub 로그인 과정을 거쳐야 한다!!!


Authorize


token


열기 하니까 잘 되었다.

잘 안되는 사람들은 아래에 나오는 방식으로 진행하면 되겠죠 ?!


function


사용법은 간단하다.

함수 이름 작성 하고 파라미터 정의하고 `{` 입력하면 회색으로 갑자기 딱! Suggestion을 보여준다.


마음에 들면 `Tab`키 누르면 되고,

마음에 안들면 `Alt + [` 또는 `Alt + ]` 누르면 다른 suggestion 들을 보여주게 된다.


그런데, 속도 이슈인지 `Alt + [` 또는 `Alt + ]` 눌렀을 때에 전환이 잘 안되는 경우가 많았다.


Ctrl + Enter


Suggestion 목록을 한 번에 보고 싶으면 `Ctrl + Enter`를 누르면 된다.

위 그림과 같이 오른쪽에 suggestion 목록을 전체 보여준다.


속도 이슈로 한번에 나오지 않더라도 기다리면 주르륵 나온다.

`Alt + [` 또는 `Alt + ]`는 다른 suggestion이 없는 것인지 아직 로딩 중인지 알 수 없어서 불편한데

차라리 그냥 `Ctrl + Enter`를 이용해서 전체를 보고 하는 것이 좋을 것 같다.


주석


함수 이름만으로는 의도를 제대로 전달하기 어려울 수 있다.

그럴 때에는 주석을 앞에 적어주면 된다.


Framework


함수만 지원하는 것도 아니다.

Express server를 사용하겠다라는 주석만으로도 코드를 제안해준다.


지금까지 알아본 과정은 GitHub에서 제공해주는 Start Guide로 진행해보았다.

- https://github.com/github/copilot-preview/blob/main/docs/gettingstarted.md


혹시 웹 관련된 JS만 잘되는 것 아닐까?


Python


확장자가 `*.py`인 파일을 만들고

`Authentication to GitHub Enterprise instance`와 같이 주석을 작성해보았다.


와우! stackoverflow 검색 보다는 훨씬 빠르게 코드를 찾아준다.

다만, 내용을 살펴보니 내가 원하는 실제 사용가능한 수준으로까지는 없었다.


주석 내용을 조금 더 디테일하게... 구체적으로 적어줘야 원하는 내용을 제안해줄 것으로 보인다.


한글


한글도 지원을 잘 해줄까!?


위 그림과 같이 잘 해준다 !!!


한글로 된 주석이 github.com에 그다지 많지 않을거라

제한적인 상황에서만 유용할 것 같지만,

여하튼 한글도 된다 !!!


token


업로드 한 사람의 잘못이긴 하겠지만

위 그림과 같이 secret 값들도 그대로 suggestion 된다.


이런 부분은 주의해야할 것 같다.


결론적으로 원하는 사항에 대해서 잘 정의할 수 있으면

최소한 Stackoverflow 검색하는 것보다 빠른 시간 안에 code를 suggestion 받을 수 있는 재미있는 기능이다.


실무에서도 유용할 지에 대해서는 직접 프로젝트를 진행하면서 사용해봐야 할 것이고,

최소한 PoC 하거나 처음 해보는 사항에 대해서 접근할 때에는 상당히 유용할 것으로 보인다.


반응형


"최적의 리액트 코드를 작성하기 위한 모범 사례와 패턴"


책의 표지에 적혀있는 문구이다.


표지


러닝 리액트 - 10점
알렉스 뱅크스.이브 포셀로 지음, 오현석 옮김/한빛미디어


React를 공부하겠다라고 하면

주변 사람들이 입문서로 가장 많이 추천한 책이었는데,

마침 이번에 새로 개정까지 되었다니~ 금상첨화 !!!


표지


표지를 보면 알겠지만,

21년 7월 1일 1쇄 발행이다!


이 책의 포지션은 "입문서"이지만,

중급자가 보기에도 나쁘지는 않을 것 같다.


CONTENTS


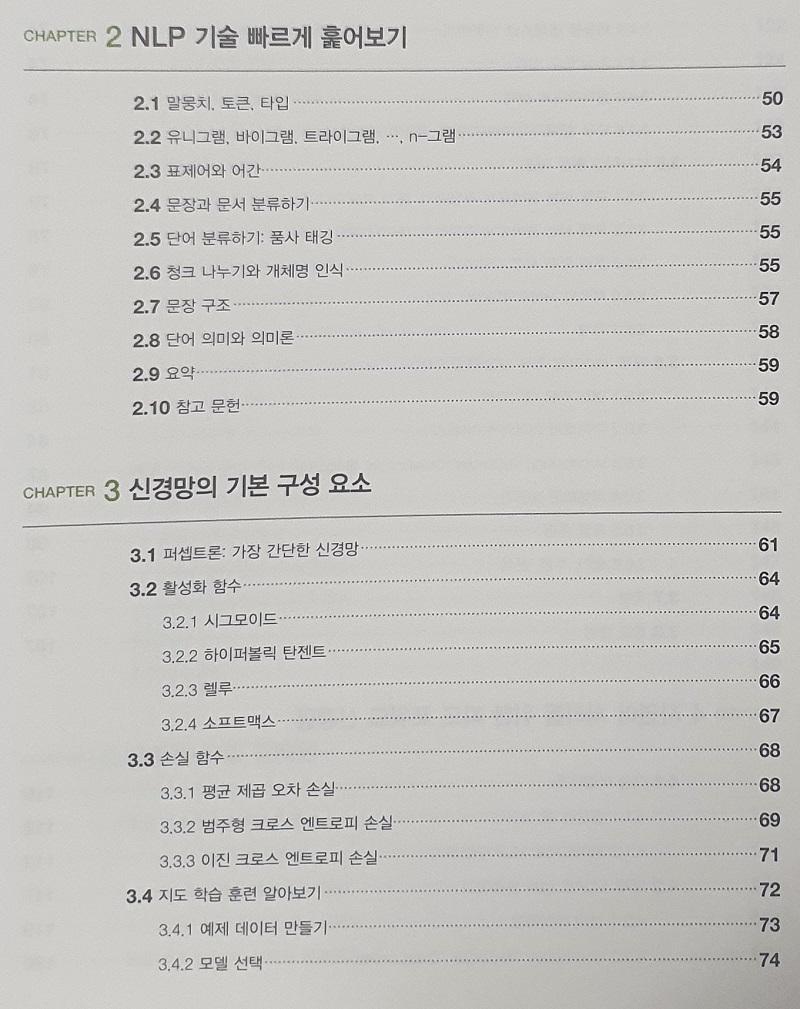
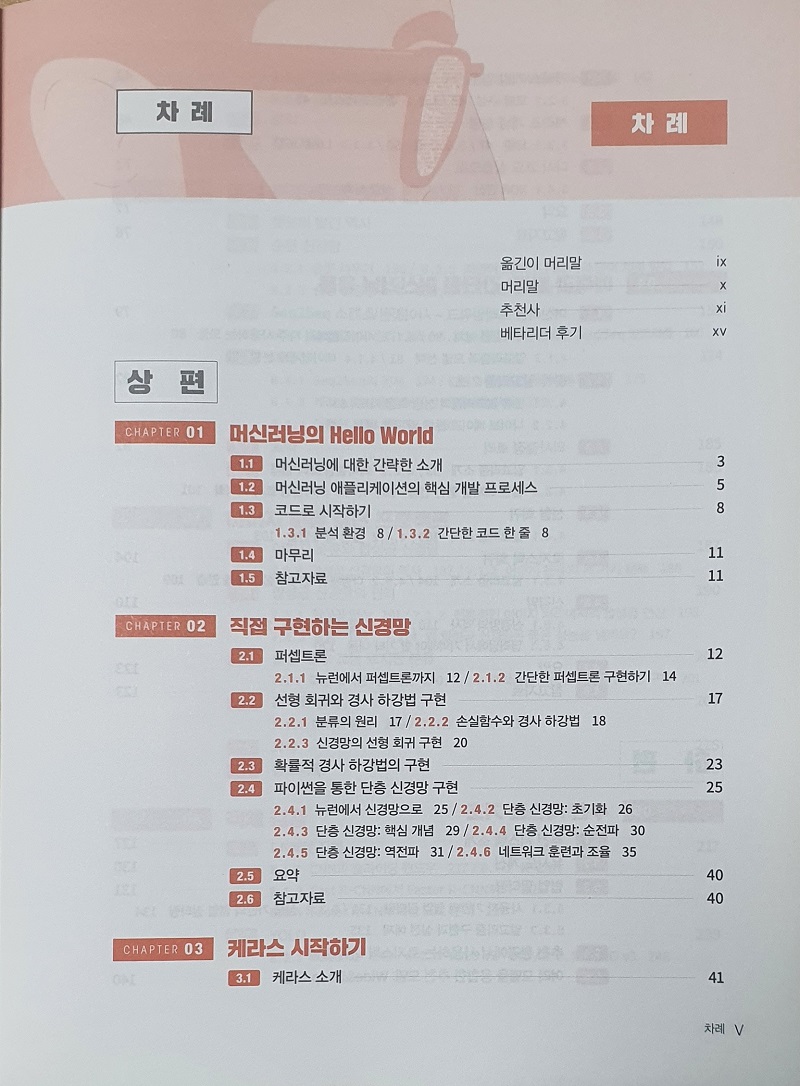
목차를 보면

리액트에 대한 소개는 물론이고

변수 선언이나 함수 만들기부터

친절하게 차근 차근 소개를 해주고 있다.


사실 리액트의 시작은 얼굴책-Facebook이다.


Facebook에 적용이 되었다고 하여 유명세를 얻게 되었으며

심지어 별스타그램-Instagram도 리액트로 만들었다고 해서

많은 신도들을 불러들인 라이브러리이다.


리액트의 과거와 미래


책에서도 이러한 리액트의 역사와 비전에 대해서도

짧게나마 소개해준다.


요즘 기본이 된 사항이지만

이 책에서 사용된 소스 코드들을

GitHub로 제공해주고 있다.


코드 예제

https://github.com/MoonHighway/learning-react


MoonHighway/learning-react

The code samples for Learning React by Alex Banks and Eve Porcello, published by O'Reilly Media - MoonHighway/learning-react

github.com


[ Pros ]

- 리액트 입문자를 위한 친절한 책

: 리액트는 무엇인지, 변수 선언은 어떻게 하는지와 같은

기초적인 것부터 친절하고 쉽게 설명해준다.


- 샘플 코드와 결과를 보기 쉽게 제공

: 편집의 힘인 것 같은데,

희한하게 다른 책과 뭐가 다른지 딱 꼬집아 말할 수는 없지만

책을 보면서 소스 코드가 눈에 잘 들어왔다.

그리고 결과 등을 보여주는 부분도 보기 좋았다.


- 충실한 github.com 예제/정보 제공

: 예제 코드를 제공해주는 github에 꼭 접속해보기 바란다.

책에서 아쉬운 부분도 많이 채워준다.

Chapter에 맞춰서 꼭 github도 같이 보기를 강력하게 추천한다.


[ Cons ]

- 개발환경 구축에 대한 설명 미흡

: 입문자를 위한 책임에도

개발환경을 갖추는 부분에 대한 설명이 조금 부족하다.

없는 것은 아닌데... 아쉽다.


- 기능 설명의 나열

: 차근 차근 공부하려는 분들에게는 좋을 수도 있는 부분인데

바로 뭔가 만들면서 공부하는 것을 좋아하는 사람에게는 조금 아쉽다.

사전처럼 필요한 부분을 찾아서 보기에 좋을 수도 있기는 한데...

이 책만 가지고 리액트를 공부하기에는 조금 아쉬울 수 있을 것 같다.


[ 총평 ]

- 리액트를 공부하기 시작했다면 꼭 갖고 있기를 추천

클론 코딩과 같은 강의를 들으면서 보면 더더욱 많은 도움이 될 것 같다!


 "한빛미디어 <나는 리뷰어다> 활동을 위해서 책을 제공받아 작성된 서평입니다."


반응형


Vagrant를 이용해서 VirtualBox에 설치할 이미지 만들기 및 등록까지 했으니

  - https://www.whatwant.com/entry/Vagrant-Box


이제는 실제 사용을 해보자.


01. create Workspace

  - Vagrant 사용을 위해서는 제일 먼저 작업을 실행할 Directory를 하나 만들어야 한다.

  - Workspace 하나 만든다고 생각하면 될 것 같다.


> mkdir vagrant-hello

    디렉터리: C:\Users\whatw\workspace

Mode                 LastWriteTime         Length Name
----                 -------------         ------ ----
d-----      2021-07-14   오후 2:00                vagrant-hello


> cd .\vagrant-hello\


02. init

  - Workspace 안에서 init 작업을 하면 된다.

  - `init` 뒤에는 사용할 이미지 주소를 적어주면 된다.

> vagrant init whatwant/Ubuntu-20.04-Server

==> vagrant: A new version of Vagrant is available: 2.2.17 (installed version: 2.2.16)!
==> vagrant: To upgrade visit: https://www.vagrantup.com/downloads.html

A `Vagrantfile` has been placed in this directory. You are now
ready to `vagrant up` your first virtual environment! Please read
the comments in the Vagrantfile as well as documentation on
`vagrantup.com` for more information on using Vagrant.


> dir

    디렉터리: C:\Users\whatw\workspace\vagrant-hello

Mode                 LastWriteTime         Length Name
----                 -------------         ------ ----
-a----      2021-07-14   오후 2:04           3104 Vagrantfile


03. check Vagrantfile

  - `init`을 하면 `Vagrantfile`을 생성해준다.

  - 첫 줄을 보면 알겠지만, ruby 포맷이다..... ㅠㅜ


# -*- mode: ruby -*-
# vi: set ft=ruby :

# All Vagrant configuration is done below. The "2" in Vagrant.configure
# configures the configuration version (we support older styles for
# backwards compatibility). Please don't change it unless you know what
# you're doing.
Vagrant.configure("2") do |config|
  # The most common configuration options are documented and commented below.
  # For a complete reference, please see the online documentation at
  # https://docs.vagrantup.com.

  # Every Vagrant development environment requires a box. You can search for
  # boxes at https://vagrantcloud.com/search.
  config.vm.box = "whatwant/Ubuntu-20.04-Server"

  # Disable automatic box update checking. If you disable this, then
  # boxes will only be checked for updates when the user runs
  # `vagrant box outdated`. This is not recommended.
  # config.vm.box_check_update = false

  # Create a forwarded port mapping which allows access to a specific port
  # within the machine from a port on the host machine. In the example below,
  # accessing "localhost:8080" will access port 80 on the guest machine.
  # NOTE: This will enable public access to the opened port
  # config.vm.network "forwarded_port", guest: 80, host: 8080

  # Create a forwarded port mapping which allows access to a specific port
  # within the machine from a port on the host machine and only allow access
  # via 127.0.0.1 to disable public access
  # config.vm.network "forwarded_port", guest: 80, host: 8080, host_ip: "127.0.0.1"

  # Create a private network, which allows host-only access to the machine
  # using a specific IP.
  # config.vm.network "private_network", ip: "192.168.33.10"

  # Create a public network, which generally matched to bridged network.
  # Bridged networks make the machine appear as another physical device on
  # your network.
  # config.vm.network "public_network"

  # Share an additional folder to the guest VM. The first argument is
  # the path on the host to the actual folder. The second argument is
  # the path on the guest to mount the folder. And the optional third
  # argument is a set of non-required options.
  # config.vm.synced_folder "../data", "/vagrant_data"

  # Provider-specific configuration so you can fine-tune various
  # backing providers for Vagrant. These expose provider-specific options.
  # Example for VirtualBox:
  #
  # config.vm.provider "virtualbox" do |vb|
  #   # Display the VirtualBox GUI when booting the machine
  #   vb.gui = true
  #
  #   # Customize the amount of memory on the VM:
  #   vb.memory = "1024"
  # end
  #
  # View the documentation for the provider you are using for more
  # information on available options.

  # Enable provisioning with a shell script. Additional provisioners such as
  # Ansible, Chef, Docker, Puppet and Salt are also available. Please see the
  # documentation for more information about their specific syntax and use.
  # config.vm.provision "shell", inline: <<-SHELL
  #   apt-get update
  #   apt-get install -y apache2
  # SHELL
end


04. check IP

  - 이 부분은 필요하신 분들만 선택적으로 하면 된다.

  - Why : 이 부분을 진행하는 이유는 다음과 같다.

    . 집에서 공유기를 사용하고 있음

    . VirtualBox에서 Ubuntu를 여러개를 실행할 계획인데,

    . 서로 간의 통신을 구성하기 위해서 각 Ubuntu의 IP를 고정하고 싶음


  - 공유기에서 비어있는 IP를 확인해놓자


  - 각자의 공유기에 따라 관리 페이지 들어가서 현재 할당되어 있는 IP 내역 확인하고,

  - 나중에 MAC 주소에 따른 IP 할당 설정을 해보자.


05. edit Vagrant

  - 리소스 포함해서 원하는 VM 모습으로 설정해보자


# -*- mode: ruby -*-
# vi: set ft=ruby :

Vagrant.configure("2") do |config|

  config.vm.box = "whatwant/Ubuntu-20.04-Server"
  config.vm.box_version = "0.1.0"

  config.vm.network "public_network", ip: "192.168.100.201"

  config.vm.provider "virtualbox" do |vb|
    vb.gui = false
    vb.cpus = "2"
    vb.memory = "2048"
  end

  config.vm.provision "shell", inline: <<-SHELL
    apt-get update
    apt-get upgrade -y
  SHELL

end


06. Vagrant Up

  - 실행해보자 !!


> vagrant up

Bringing machine 'default' up with 'virtualbox' provider...
==> default: Importing base box 'whatwant/Ubuntu-20.04-Server'...
==> default: Matching MAC address for NAT networking...
==> default: Checking if box 'whatwant/Ubuntu-20.04-Server' version '0.1.0' is up to date...
==> default: Setting the name of the VM: vagrant-hello_default_1626272864694_38723
==> default: Clearing any previously set network interfaces...
==> default: Preparing network interfaces based on configuration...
    default: Adapter 1: nat
    default: Adapter 2: bridged
==> default: Forwarding ports...
    default: 22 (guest) => 2222 (host) (adapter 1)
==> default: Running 'pre-boot' VM customizations...
==> default: Booting VM...
==> default: Waiting for machine to boot. This may take a few minutes...
    default: SSH address: 127.0.0.1:2222
    default: SSH username: vagrant
    default: SSH auth method: private key
    default: Warning: Connection reset. Retrying...
    default: Warning: Connection aborted. Retrying...
    default:
    default: Vagrant insecure key detected. Vagrant will automatically replace
    default: this with a newly generated keypair for better security.
    default:
    default: Inserting generated public key within guest...
    default: Removing insecure key from the guest if it's present...
    default: Key inserted! Disconnecting and reconnecting using new SSH key...
==> default: Machine booted and ready!
==> default: Checking for guest additions in VM...
==> default: Configuring and enabling network interfaces...
==> default: Mounting shared folders...
    default: /vagrant => C:/Users/whatw/workspace/vagrant-hello
==> default: Running provisioner: shell...
    default: Running: inline script
    default: Hit:1 http://kr.archive.ubuntu.com/ubuntu focal InRelease
    default: Get:2 http://kr.archive.ubuntu.com/ubuntu focal-updates InRelease [114 kB]
    default: Get:3 http://kr.archive.ubuntu.com/ubuntu focal-backports InRelease [101 kB]
    default: Get:4 http://kr.archive.ubuntu.com/ubuntu focal-security InRelease [114 kB]
    default: Get:5 http://kr.archive.ubuntu.com/ubuntu focal-updates/main amd64 Packages [1,086 kB]
    default: Get:6 http://kr.archive.ubuntu.com/ubuntu focal-updates/main Translation-en [239 kB]
    default: Get:7 http://kr.archive.ubuntu.com/ubuntu focal-updates/main amd64 c-n-f Metadata [13.8 kB]
    default: Get:8 http://kr.archive.ubuntu.com/ubuntu focal-updates/universe amd64 Packages [841 kB]
    default: Get:9 http://kr.archive.ubuntu.com/ubuntu focal-updates/universe Translation-en [176 kB]
    default: Get:10 http://kr.archive.ubuntu.com/ubuntu focal-updates/universe amd64 c-n-f Metadata [18.3 kB]
    default: Get:11 http://kr.archive.ubuntu.com/ubuntu focal-backports/universe amd64 Packages [5,792 B]
    default: Get:12 http://kr.archive.ubuntu.com/ubuntu focal-backports/universe amd64 c-n-f Metadata [288 B]
    default: Get:13 http://kr.archive.ubuntu.com/ubuntu focal-security/main amd64 Packages [745 kB]
    default: Get:14 http://kr.archive.ubuntu.com/ubuntu focal-security/main Translation-en [148 kB]
    default: Get:15 http://kr.archive.ubuntu.com/ubuntu focal-security/main amd64 c-n-f Metadata [8,036 B]
    default: Get:16 http://kr.archive.ubuntu.com/ubuntu focal-security/universe amd64 Packages [629 kB]
    default: Get:17 http://kr.archive.ubuntu.com/ubuntu focal-security/universe Translation-en [96.2 kB]
    default: Get:18 http://kr.archive.ubuntu.com/ubuntu focal-security/universe amd64 c-n-f Metadata [11.6 kB]
    default: Fetched 4,346 kB in 13s (322 kB/s)
    default: Reading package lists...
    default: Reading package lists...
    default: Building dependency tree...
    default:
    default: Reading state information...
    default: Calculating upgrade...
    default: The following packages will be upgraded:
    default:   libuv1 linux-base
    default: 2 upgraded, 0 newly installed, 0 to remove and 0 not upgraded.
    default: 1 standard security update
    default: Need to get 98.5 kB of archives.
    default: After this operation, 0 B of additional disk space will be used.
    default: Get:1 http://kr.archive.ubuntu.com/ubuntu focal-updates/main amd64 libuv1 amd64 1.34.2-1ubuntu1.3 [80.8 kB]
    default: Get:2 http://kr.archive.ubuntu.com/ubuntu focal-updates/main amd64 linux-base all 4.5ubuntu3.6 [17.8 kB]
    default: dpkg-preconfigure: unable to re-open stdin: No such file or directory
    default: Fetched 98.5 kB in 1s (73.4 kB/s)
    default: (Reading database ...
(Reading database ... 45%abase ... 5%
(Reading database ... 55%abase ... 50%
    default: (Reading database ... 60%
    default: (Reading database ... 65%
    default: (Reading database ... 70%
    default: (Reading database ... 75%
    default: (Reading database ... 80%
    default: (Reading database ... 85%
    default: (Reading database ... 90%
    default: (Reading database ... 95%
(Reading database ... 145156 files and directories currently installed.)
    default: Preparing to unpack .../libuv1_1.34.2-1ubuntu1.3_amd64.deb ...
    default: Unpacking libuv1:amd64 (1.34.2-1ubuntu1.3) over (1.34.2-1ubuntu1.1) ...
    default: Preparing to unpack .../linux-base_4.5ubuntu3.6_all.deb ...
    default: Unpacking linux-base (4.5ubuntu3.6) over (4.5ubuntu3.5) ...
    default: Setting up linux-base (4.5ubuntu3.6) ...
    default: Setting up libuv1:amd64 (1.34.2-1ubuntu1.3) ...
    default: Processing triggers for man-db (2.9.1-1) ...
    default: Processing triggers for libc-bin (2.31-0ubuntu9.2) ...


  - `Vagrantfile`에서 `vb.gui = false` 설정을 했기에, `VirtualBox`가 별도 실행되지 않는다.

  - 직접 `VirtualBox`를 실행해보면 다음과 같이 새로 머신이 하나 추가된 것을 볼 수 있다.


  - 머신 이름은 새로 생성한 Workspace(Directory) 이름 + 별칭 + 랜덤 숫자 ...

  - 머신을 더블 클릭하면 실행된 머신이 나타난다


  - 로그인 ID / Password는 모두 `vagrant`


07. status

  - 현재 `Vagrant`의 상태를 확인해보자.

  - 사용할 수 있는 명령어도 친절히 알려준다.


> vagrant status

Current machine states:

default                   running (virtualbox)

The VM is running. To stop this VM, you can run `vagrant halt` to
shut it down forcefully, or you can run `vagrant suspend` to simply
suspend the virtual machine. In either case, to restart it again,
simply run `vagrant up`.


여기까지 끄읕~

반응형


최근 Docker 또는 Kubernetes 인기로 인하여 Container가 인기의 주역이 되면서

주로 VM 환경과 같이 사용되는 Vagrant의 인기가 많이 줄어든 것 같다.


하지만, 여전히 VM에 대한 수요는 있고

Vagrant의 효용성도 여전히 높다고 여겨지기에 공부를 해보려 한다.


01. Vagrant

  - Vagrant 메인 사이트는 vagrant.com이 아니라 vagrantup.com 이다 ^^

  - https://www.vagrantup.com/


02. Install

  - 설치는 별거 없다. 그냥 슝슝~


03. Vagrant Hub ?

  - DockerHub처럼 Vagrant에서도 Hub가 있다 !!

  - https://app.vagrantup.com/


04. VirtualBox Guest OS 준비

  - Ubuntu 20.04 Server 이미지를 만들어서 업로드 해봤다.

  - Vagrant Box로 만들기 위해서는 다음의 과정을 거쳐야 한다.


  ① 작업 환경

    - Host PC(Windows 10)에서 VirtualBox 설치

    - VirtualBox에서 Guest OS로 Ubuntu 20.04 Server 설치

    → Vagrant Box 업로드 用 이미지로 만들기 위한 과정 진행 !!


  ② vagrant 계정 생성
    - 패스워드도 vagrant로 설정

$ sudo adduser vagrant


  ③ visudo 등록


$ sudo visudo

# Add the following line to the end of the file.
vagrant ALL=(ALL) NOPASSWD:ALL


  ④ SSH 설정


$ sudo su vagrant


$ cd

$ mkdir .ssh

$ wget --no-check-certificate https://raw.github.com/mitchellh/vagrant/master/keys/vagrant.pub -O .ssh/authorized_keys

--2021-07-04 18:37:56--  https://raw.github.com/mitchellh/vagrant/master/keys/vagrant.pub
Resolving raw.github.com (raw.github.com)... 185.199.111.133, 185.199.109.133, 185.199.108.133, ...
Connecting to raw.github.com (raw.github.com)|185.199.111.133|:443... connected.
HTTP request sent, awaiting response... 301 Moved Permanently
Location: https://raw.githubusercontent.com/mitchellh/vagrant/master/keys/vagrant.pub [following]
--2021-07-04 18:37:57--  https://raw.githubusercontent.com/mitchellh/vagrant/master/keys/vagrant.pub
Resolving raw.githubusercontent.com (raw.githubusercontent.com)... 185.199.108.133, 185.199.111.133, 185.199.110.133, ...
Connecting to raw.githubusercontent.com (raw.githubusercontent.com)|185.199.108.133|:443... connected.
HTTP request sent, awaiting response... 200 OK
Length: 409 [text/plain]
Saving to: ‘.ssh/authorized_keys’

.ssh/authorized_keys             100%[========================================================>]     409  --.-KB/s    in 0s

2021-07-04 18:37:57 (36.9 MB/s) - ‘.ssh/authorized_keys’ saved [409/409]


  ⑤ SSH Server 설치


$ sudo apt install -y openssh-server

$ sudo nano /etc/ssh/sshd_config

Port 22
PubkeyAuthentication yes
AuthorizedKeysFile .ssh/authorized_keys
PermitEmptyPasswords no

$ sudo service ssh restart


  ⑥ hostname 변경

    - 이 부분은 꼭 필요한 과정은 아니고, 필요에 따라서...


$ hostnamectl set-hostname whatwant


  ⑦ 불필요한 계정 정리

    - 이 부분 역시 꼭 필요한 과정은 아니고, 필요에 따라서...


$ sudo deluser whatwant


  ⑧ 동적 디스크 정리

    - VIrtualBox의 디스크 영역을 깨끗하게 정리하기 위해서 수행


$ sudo dd if=/dev/zero of=/EMPTY bs=1M

$ sudo rm -f /EMPTY


  ⑨ 시스템 종료


$ sudo shutdown -h now


05. convert Image(Vagrant Box)

  - 이제 준비된 VirtualBox Image를 Vagrant Image로 convert 해보자.

  - VirtualBox Guest 파일들이 저장된 위치를 찾아서 이동

> dir
total 14473272
drwxr-xr-x 1 whatw 197609           0  7월  4 18:30  Logs/
drwxr-xr-x 1 whatw 197609           0  7월  4 18:23  Snapshots/
-rw-r--r-- 1 whatw 197609       20613  7월  4 18:30 'Ubuntu 20.04 Server Worker1.vbox'
-rw-r--r-- 1 whatw 197609       20642  7월  4 18:23 'Ubuntu 20.04 Server Worker1.vbox-prev'
-rw-r--r-- 1 whatw 197609 14820573184  5월  5 16:49 'Ubuntu Server 20.vdi'

  - `package` 명령어를 이용해서 convert 하면 된다.

  - 아래 타이핑한 내역을 잘 살펴보기 바란다 (.vbox 사용하지 않기와 같은...^^)

> vagrant package --base "Ubuntu 20.04 Server Worker1" --out "ubuntu2004server.box"
==> Ubuntu 20.04 Server Worker1: Attempting graceful shutdown of VM...
    Ubuntu 20.04 Server Worker1: Guest communication could not be established! This is usually because
    Ubuntu 20.04 Server Worker1: SSH is not running, the authentication information was changed,
    Ubuntu 20.04 Server Worker1: or some other networking issue. Vagrant will force halt, if
    Ubuntu 20.04 Server Worker1: capable.
==> Ubuntu 20.04 Server Worker1: Forcing shutdown of VM...
==> Ubuntu 20.04 Server Worker1: Exporting VM...
==> Ubuntu 20.04 Server Worker1: Compressing package to: C:/Users/whatw/VirtualBox VMs/Ubuntu 20.04 Server Worker1/ubuntu2004server.box


06. add Box

  - 위에서 만든 Box를 등록하는 과정이다

> vagrant box add "ubuntu2004server" "C:\Users\whatw\ubuntu2004server.box"

==> box: Box file was not detected as metadata. Adding it directly...
==> box: Adding box 'ubuntu2004server' (v0) for provider:
    box: Unpacking necessary files from: file:///C:/Users/whatw/ubuntu2004server.box
    box:
==> box: Successfully added box 'ubuntu2004server' (v0) for 'virtualbox'!


07. SHASUM

  - 뒤에 사용될 것을 미리 확인해놓자

  - 파일 이름 뒤의 `SHA256`을 꼭 써줘야 한다!!!

> certutil -hashfile .\ubuntu2004server.box sha256

SHA1의 .\ubuntu2004server.box 해시:
7e6b73addaaea6c430c54dc16fd968ba740c7272e68807e0cf57f6fa5e28c499
CertUtil: -hashfile 명령이 성공적으로 완료되었습니다.


08. Vagrant Cloud 준비

  - `03. Vagrant Hub ?`에서 회원가입을 했다면 아래와 같은 화면을 확인할 수 있다.


  - `Create a new Vagrant Box` 클릭하고 계속 진행해보자.


  - 버전은... 링크로 있는 `RubyGems versioning`을 한 번 확인해보기 바란다.

  - 제대로 사용하도록 하려면 사실 `1.0.0`으로 해주는 것이...


  - 앞에서 미리 확인한 SHA Checksum 값을 넣어주면 된다. (위의 이미지에 있는 Checksum 값은 틀렸다 ^^)


  - 업로드~ 쭉~ 쭉~ 쭉쭉쭉~


  - 처음에는 위와 같이 `unreleased` 상태로 나온다.

  - `Release` 버튼을 눌러버리면 ...


  - 이제 뭔가 잘 된 것 같다!


끄읕~~~ (정리는 왠지 항상 힘들어...)

반응형


출처: https://goomics.net/251/


인도로 다니는 자전거, 자전거 도로를 걷는 사람들... 위트있는 그림이다.


그런데, 그림을 잘보면... 그림에 나오는 저 장소가 어디인지 맞출 수 있다.


컬러풀한 자전거를 보면 ... 그렇다! Google 이다.


구글 내부의 이야기를 들려주는 재미있는 Comics를 볼 수 있는 사이트가 있다.


https://goomics.net/


Goomics


goomics.net


단행본으로도 나왔다.


https://www.amazon.com/Goomics-Googles-corporate-revealed-internal/dp/0988523841


Goomics: Google's corporate culture revealed through internal comics

Goomics: Google's corporate culture revealed through internal comics

www.amazon.com


게시된 그림들을 보면 느낀점은...


"저기도 결국은 사람 사는 곳이구나~"

"우리 회사랑 똑같네 뭐~"


^^


반응형


어쩌다 알게된 재미있는 내용 공유 !!!


아래 사이트를 접속하면 다음과 같은 화면이 나온다.

  - https://developer.bbc.com/


가로 크기를 줄이면 살짝 재미있어진다.


이미지 세로 크기가 조금 커졌다.


그런데, 이미지에 있는 노트북 화면을 드래그 하면 블럭 설정이 된다.


Ctrl+C, Ctrl+V 하면 ...


THE HITCHHIKER'S GUIDE TO THE GALAXY
Infocom interactive fiction - a science fiction story
Copyright (c) 1984 by Infocom, Inc. All rights reserved.
Release 59 / Serial number 851108

You wake up. The room is spinning very gently round your head. Or at least it would be if you could see it which you can't.

It is pitch black.

>turn on lights
Good start to the day. Pity it's going to be the worst one of your life. The light is now on.

Bedroom, in the bed
The bedroom is a mess.
It is a small bedroom with a faded carpet and old wallpaper. There is a washbasin, a chair with a tatty dressing gown slung over it, and a window with the curtains drawn. Near the exit leading south is a phone.
There is a flathead screwdriver here. (outside the bed)
There is a toothbrush here. (outside the bed)

>take screwdriver
You can't reach it from the bed. The effort almost kills you.

>get up
Very difficult, but you manage it. The room is still spinning. It dips and sways a little.

>take screwdriver
It dances by you like a thing possessed.


응?! 정말 글씨가 나온다.


위 내용은 그냥 아무 것이나 붙여놓은 것이 아니다.


아래 사이트의 내용과 연관되어 있다.

  - https://www.bbc.co.uk/programmes/articles/1g84m0sXpnNCv84GpN2PLZG/the-game-30th-anniversary-edition


다시 원점으로 돌아가서...


노트북의 내용은 지울 수도 있고, 직접 글씨를 쓸 수도 있다.


이거... 이거...

BBC 여기 오타쿠 집합소인가?!


반응형


매번 귀찮게 찾는 것이 귀찮아서 정리하고자 포스팅 해본다.


1. Python3 설치하기

$ sudo apt install python3 python3-pip


2. update-alternative 설정하기

$ sudo update-alternatives --install /usr/bin/python python /usr/bin/python2 1
$ sudo update-alternatives --install /usr/bin/python python /usr/bin/python3 2
$ sudo update-alternatives --install /usr/bin/pip pip /usr/bin/pip3 1


3. select

$ sudo update-alternatives --config python
$ sudo update-alternatives --config pip


아~ 속 시원하다~!!

반응형

MinIO

Amazon S3 서비스를 On-Premise 환경에서 사용할 수 있도록 해주는

최근 많은 인기를 얻고 있는 유명한 Object Storage 프로젝트이다.


https://min.io/


MinIO | High Performance, Kubernetes Native Object Storage

MinIO's High Performance Object Storage is Open Source, Amazon S3 compatible, Kubernetes Native and is designed for cloud native workloads like AI.

min.io


AI 개발환경을 On-Premise에서 구축할 때

사진, 동영상 같은 데이터 또는 컨테이너 이미지와 같은 비정형 데이터를 저장하기 위한 서비스 中

설치도 간편하고 Amazon S3와 호환이 되다보니 MinIO가 아주 유명세를 떨쳤다.


그래서, 신규 시스템을 구축할 때 스토리지 용도로 MinIO를 선택했는데...

막상 해보니... 쉬운 아이가 아닌 것 같다는....


지금부터 설명할 과정은 다음과 같은 환경에서 진행하였다.


- VirtualBox Guest 3개 구성

  . Guest OS : Ubuntu 20.04 Server - 64bit

  . Guest HW : CPU 2 core, MEM 4 GB


- Kubernetes : 1 master, 2 worker node 구성

  . 설치 도구 : Kubespray

  . K8s version : 1.20.6


MinIO 설치는 Kubernetes 환경에서 Standalone 방식으로 진행해보고자 한다.


참고했던 컨텐츠는 아래와 같다.


https://github.com/kubernetes/examples/tree/master/staging/storage/minio


kubernetes/examples

Kubernetes application example tutorials. Contribute to kubernetes/examples development by creating an account on GitHub.

github.com


1. StorageClass

    - 특정 노드의 local storage를 실제 저장공간으로 사용하기 위한 내용으로 작성했다.

    - dynamic provisioning을 위해 volumeBindingMode를 'WaitForFirstComsumer'로 잡았다.


[ minio-standalone-storageclass.yaml ]

apiVersion: storage.k8s.io/v1
kind: StorageClass
metadata:
  name: local-storage

provisioner: kubernetes.io/no-provisioner

volumeBindingMode: WaitForFirstConsumer


2. PersistentVolume

    - worker node 中 하나인, 'worker2'의 특정 디렉토리를 실제 저장 공간으로 정했다.


[ minio-standalone-pv.yaml ]

apiVersion: v1
kind: PersistentVolume
metadata:
  name: local-pv

spec:
  capacity:
    storage: 1Gi

  accessModes:
  - ReadWriteOnce

  persistentVolumeReclaimPolicy: Retain

  storageClassName: local-storage

  local:
    path: /data/volumes/pv1

  nodeAffinity:
    required:
      nodeSelectorTerms:
      - matchExpressions:
        - key: kubernetes.io/hostname
          operator: In
          values:
          - worker2


3. PersistentVolumeClaim

    - 앞에서 선언한 StorageClass, PersistentVolume과 매핑되는 PVC를 작성했다.


[ minio-standalone-pvc.yaml ]

apiVersion: v1
kind: PersistentVolumeClaim
metadata:
  name: minio-pv-claim
  labels:
    app: minio-storage-claim

spec:
  accessModes:
    - ReadWriteOnce

  storageClassName: local-storage

  resources:
    requests:
      storage: 1Gi


4. Deployment

    - MinIO 서비스를 위한 Deployment이며, 당연히 앞에서 선언한 PVC를 사용했다.


[ minio-standalone-deployment.yaml ]

apiVersion: apps/v1
kind: Deployment
metadata:
  name: minio-deployment

spec:
  selector:
    matchLabels:
      app: minio

  strategy:
    type: Recreate

  template:
    metadata:
      labels:
        app: minio

    spec:
      volumes:
      - name: storage
        persistentVolumeClaim:
          claimName: minio-pv-claim

      containers:
      - name: minio
        image: minio/minio:latest
        args:
        - server
        - /storage
        env:
        - name: MINIO_ACCESS_KEY
          value: "minio"
        - name: MINIO_SECRET_KEY
          value: "minio123"
        ports:
        - containerPort: 9000
          hostPort: 9000
        volumeMounts:
        - name: storage
          mountPath: "/storage"


5. Service

    - MinIO 서비스를 외부로 노출하기 위한 Service를 선언해보았다.


[ minio-standalone-service.yaml ]

apiVersion: v1
kind: Service
metadata:
  name: minio-service

spec:
  type: NodePort

  ports:
    - port: 9000
      targetPort: 9000
      nodePort: 30333

  selector:
    app: minio


[ 결과 ]

여기까지

차례대로 create 하면 MinIO 서비스 웹을 볼 수 있다.


MinIO


Access Key / Secret Key 값은 Deployment YAML을 보면 확인할 수 있다.


MinIO


오른쪽 하단에 있는 "+" 버튼을 통해 bucket도 생성할 수 있고, 파일도 업로드 할 수 있다.

물론 다운로드도 가능한 Storage 웹서비스를 확인할 수 있다.


반응형

+ Recent posts